Operation
Getting started
The quickest way to get started with the SMD3, having completed wiring up according to the previous chapter is to install the SMD3 software on your PC (see section 6), power on the SMD3 and connect it with the USB lead to the PC. The SMD3 software provides an intuitive and easy way to configure and evaluate the features of the SMD3 described in the remainder of this section.
This section discusses the various operational modes and configuration options available. The SMD3 software provides easy access to these functions, as well as help text describing each. If communicating with the SMD3 directly, using a terminal program or your own software, see section 7 which lists the commands available.
Operating modes
There are five operating modes:
|
Remote
Accepts commands from host PC or PLC; powerful software supplied, control and configure multiple axes at once. All setup (including mode selection) must be performed using the remote interface. |
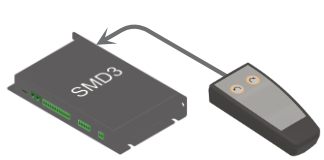
Joystick
Ideal for basic movement during commissioning; press for one step, press and hold for continuous movement; latching mode option. |
|
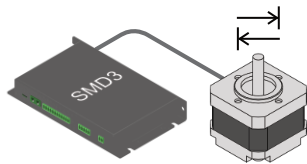
Step/Direction
Opto-isolated step and direction; configurable rising or rising/falling edge; up to 256x interpolation. |
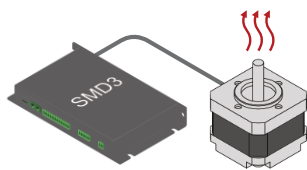
Bake
Heats the motor by energising both phases and holding the motor stationary, regulating the current to achieve a setpoint temperature. Used to drive off adsorbed moisture in the motor. |
|
Step/Direction triggered velocity
Start/stop using step signal, Positive/negative movement according to direction signal; configurable velocity profile. |
Home
Home mode drives the motor to the positive or negative limit switch. |
INFORMATION: Mode can be changed only when the motor is not performing any movement. This can be verified by checking the standby flag, which is returned in a status register by the SMD3 on every communication, see section 7.2. The firmware prevents mode change when the standby flag is not set.
In the case of Step/Direction mode, it is the responsibility of the external controller to perform any final activities, such as coming to a stop, before changing the mode.
Step/Direction
Motor movement is controlled by externally supplied step and direction signals. The SMD3 can be configured to step on the rising or rising and falling edges, which halves the step clock rate.
Note that the external enable fault is non-latching when in step direction mode; once the external enable state is restored, or the external enable setting is changed to false, normal operation will resume immediately without the need to clear it. See also section X3-I/O.
|
Step input |
|
Direction input |
|||
|
|
Both |
Rising only |
|
|
Meaning |
|
Rising |
Step |
Step |
|
Low |
Positive |
|
Falling |
Step |
|
|
High |
Negative |
Steps are generated according to the current resolution. For example, with the edge setting on rising only, and microstep resolution set to 128, each rising edge on the step input will generate a single 1/128th step in the positive direction.
A step interpolation option is available; when enabled, the step input behaves as it would with the current resolution, except that each step input is interpolated to 256 microsteps. This is done by evaluating the rate at which steps arrive and timing 256 microsteps within the step to step period. This gives all the benefits of microstepping at high resolution while minimising the input clock rate.
The relationship between step input, resolution and actual step frequency is given below:
Motor Step frequency [Hz] = (Step input [Hz] / Resolution)
INFORMATION: Stopping on fractional steps
There is no mechanism to prevent the motor from stopping on fractional steps as there is in all other modes.
Stopping on fractional steps will result in the motor temperature rising much faster than it otherwise would and is generally not suitable for vacuum applications. Therefore, configure the external step generator to meet this criteria.
INFORMATION: Preparation before switching out of Step/Direction mode
When changing to another mode from Step/Direction mode, ensure that any movement being commanded via Step/Direction interface has completed before switching.
Step/Direction triggered velocity
This mode works the same as joystick continuous mode (see 5.2.4), except that the positive and negative inputs that would normally be supplied via the joystick input are instead generated from the step and direction inputs:
Remote
Joystick
Bake
Home
General concepts
User interface
Persistence of settings
Motor current
Microstepping
Freewheel mode
Velocity and Positioning mode
Initiating movement
Monitoring the motor
Enable input
Motor configuration
Temperature sensor selection
AML motors can be supplied with either a K-Type thermocouple or PT100 RTD temperature sensor. Ensure the sensor is connected to the thermocouple (X4 - Thermocouple) or RTD (X3 – I/O, see 4.3.4) input, and make the appropriate selection. The temperature sensor select command [TSEL] allows selection between thermocouple and RTD.
INFORMATION: The motor is disabled if the temperature sensor is misconnected, faulty or the temperature measurement exceeds 190 °C in order to protect the motor from possible damage to the insulation material.
Check that the motor temperature sensor selection matches that of your motor.
Profile configuration
Start and stop frequency
Acceleration and deceleration
Changing direction
Limits
Faults
Types of fault
Clearing a fault
Faults may be cleared using the clear command [CLR], or by pulling the fault reset pin to the ‘GND’ pin on ‘X3 – I/O’.
The external enable fault is non-latching when in step direction mode; once the external enable state is restored, or the external enable setting is changed to false, normal operation will resume immediately without the need to clear it as described above.


